Did you know that WordPress has the ability to schedule your posts to be published at a future date and time? It is an extremely useful feature that can be easily overlooked by beginners. When you schedule your posts out, you no longer have to worry about publishing articles at a certain time and you can even batch write many articles in advance to have them post over a schedule period of weeks or even months. Publishing articles on a regular basis is the best way to create a successful blog. And what’s more, using the scheduling feature you can have your posts schedule during peak visiting hours on the days that you want. This means that you don’t have to be uploading your post manually at that exact time, WordPress will simply do it for you.
Scheduling Posts in WordPress
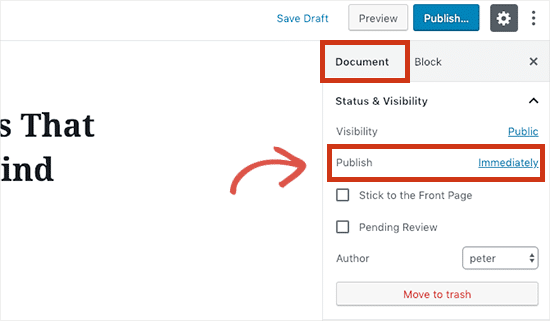
The scheduling option can be easy to overlook when you’re first starting out. Once you’ve written your blog post and have everything ready to publish, go over to the Document tab in the right column of the editing screen. Under Status and Visibility you will see a tab that says Publish. Next to Publish, there will be a blue button labeled Immediately. Clicking on Immediately will pull up a calendar where you can select the date and time that you want your post to be automatically published.

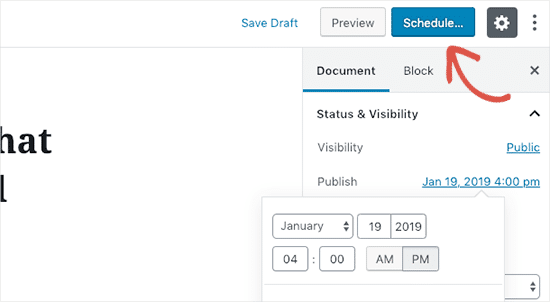
You will notice that once you’ve selected a future time and date your post will change from saying Publish to saying Schedule. When you’re ready to go, click on the blue Schedule button and your post will be automatically published on the time and date set.
Troubleshooting Errors
Using the right time zone
Scheduled posts will be automatically posted on the date and time selected, during your preferred time zone. If you would like to change this time zone, you will need to change your time zone within the WordPress settings. Keep in mind that this will affect the time zone across your entire site, so if you only want certain posts to go up in a different time zone you will need to manually calculate how many hours the schedule post should be adjusted. For example, if you live in Boise, ID, which uses Mountain Time, and you want to schedule your post for viewers in Eastern Time, you will need to adjust the scheduled time forward 2 hours.
Viewing all scheduled posts
Under Posts > All Posts you can click on the Scheduled link located above the posts table. This will take you to a list of all scheduled posts and when they are scheduled to run. You can also unschedule posts by editing the post status from Scheduled to Draft and then publishing the post manually or simply keeping it saved as a draft post.