Wishlists allow your users to save their favorite products so they can quickly access them later and complete their purchase. They also make it easy for your users to share their favorite items with friends and family or add them to a gift registry.
Why Should You Add a Wishlist to Your WooCommerce Store?
A wishlist lets customers save products from your site on a list. It helps your customers to remember which products they want to purchase in the future and allows them to access them quickly and easily on your WooCommerce store.
Customers can also share their wishlists with friends and family or add their wishlist to a gift registry. This not only encourages more sales, but it can also greatly boost brand awareness and increases traffic to your website.
Another benefit of using wishlists in your WooCommerce store is that they allow you to see which of your products are most frequently added to customers’ wishlists. You can then run promotional sales and offer discounts on these products to boost your sales.
Adding a Wishlist to Your WooCommerce Store
The easiest way to add a wishlist to your WooCommerce site is with a plugin, like YITH WooCommerce Wishlist.
YITH WooCommerce Wishlist is a free WooCommerce plugin that adds a wishlist to your website and then share that wishlist with friends and family.
First, you’ll need to install and then activate the plugin on your WooCommerce site. For more information on how to do this you can view this guide from WPBeginner on how to install a WordPress plugin.
Once you’ve activated the plugin you can go to YITH > Wishlist from your WordPress dashboard.
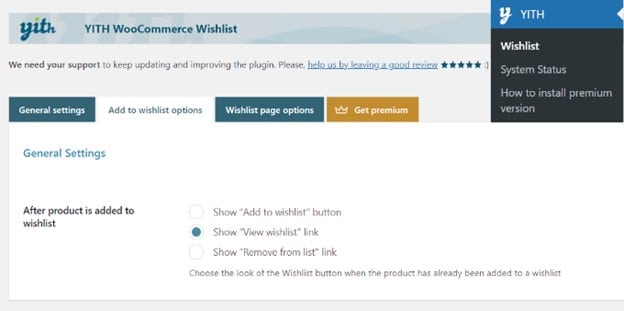
The plugin will automatically add an ‘Add to wishlist’ button to each of your products that users can click on to save their favorite products.
In the general wishlist settings you can select which link to show after a user adds a product to their wishlist. This can continue to show up as an ‘Add to wishlist’ button after they’ve added the product, or you can choose to have it show as ‘View wishlist’ or ‘Remove from list’.
Next, you’ll see the loop settings and the product page settings. The allows you to choose where you’d like the ‘Add to wishlist’ button to show up on the product page.
By default, it will be shown after the ‘Add to Cart’ button. If you want this to show up on a different part of the page, you can click on the dropdown menu next to ‘Position of “Add to wishlist” on product page’ to select a different page position.

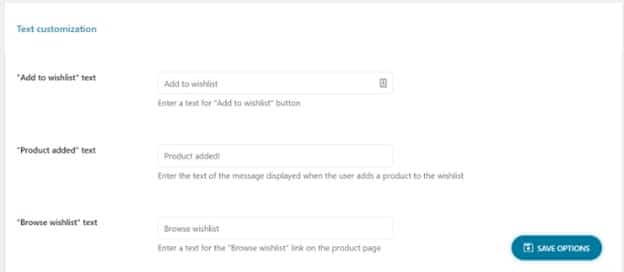
You can then scroll down for text customization if you want the ‘Add to wishlist’ button to say something else, and you can edit the color and style of the button if you want to.
Remember to click ‘Save Options’ before clicking away to ensure you don’t lose any of your changes.
Now we’re going to head over to the ‘Wishlist page options’ tab within settings.
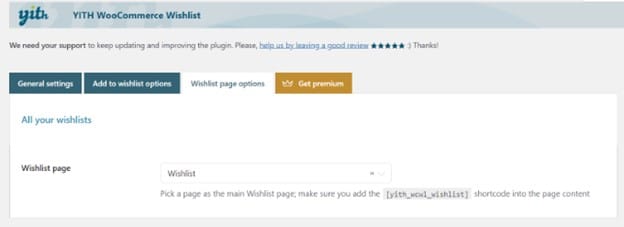
By default, the plugin will create a new page on your WooCommerce site for wishlists. If you wish to use a different page, you can select a different page from the dropdown menu. You can also show wishlists on any page using the [yith_wcwl_wishlist] shortcode.
If you scroll down the page, you can view settings on which details you’d like to include in the wishlist table.

There are options to show product variations, price, and stock for the product. You can also choose to show the date that the product was added to the wishlist, add an ‘Add to cart’ button under each product, and add icons or buttons to remove the product from the wishlist which will show up on the left and right side of the product respectively.
Additionally, there are toggle buttons for redirecting users to the cart page when they add a product to their cart from the wishlist page, and to remove the product from the wishlist once it has been added to the cart.
You can even configure settings for sharing the wishlist across social media platforms and customize the text that shows up when a user shares their wishlist.
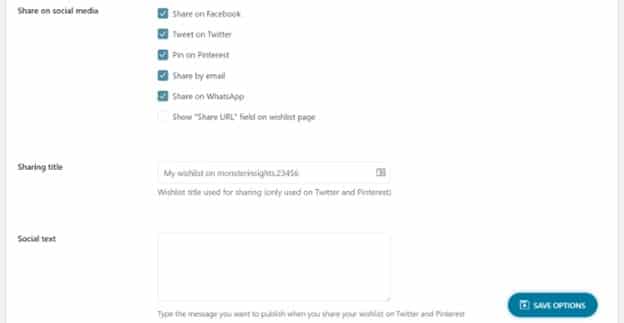
This plugin also offers settings to customize the style and color of both the sharing button and the social media channel buttons.
Once again, don’t forget to click ‘Save Options’ when you’re done so that you don’t lose any of the changes that you’ve made.
You can now look at your WooCommerce site and see the ‘Add to wishlist’ button on the product page.
When a user clicks on the ‘Add to wishlist’ link, they can view all the products in their wishlist and choose to remove items or add items to the cart from their wishlist.
At the bottom of the wishlist the sharing options that you selected will be shown, allowing the user to share their wishlist across various social media platforms or to send it across email or other messaging apps.
If you want to purchase the premium version of the YITH WooCommerce Wishlists plugin you will also get access to features such as:
- View wishlists created by logged-in customers
- View a list of the most popular products being added to wishlists
- Send promotional emails to users who have added a specified product to their wishlist
- Enable/disable wishlist features for users that aren’t logged in
- Allow users to create and manage multiple wishlists
- Allow users to search for and view registered wishlists
- Allow users to set visibility options on their wishlists
- Allow users to change the item quantity for each product in their wishlist
- Allow users to move a product from one wishlist to another
- Choose different layouts and modern designs for the wishlist page
- Provide your users with widgets on your site to help them find their wishlists quickly and easily
You can take a closer look at YITH WooCommerce Wishlist Premium right here.
The premium version of the plugin is $94.99/year and comes with a 30-day money back guarantee refund policy if you aren’t satisfied with the plugin.