What is WordPress Dashboard?
WordPress Admin is the administrative side of a website on WordPress. This is the backend where you can make changes, adjust settings, publish new posts or pages, and modify the appearance of your site. The left-hand menu is the center of everything you will work on. Understanding this menu is crucial and being familiar with all of the different buttons and options till not only speed up your work, but will also make any changes you wish to implement much easier to accomplish.
WordPress Dashboard Options
Once you have logged in to WordPress you will be taken to the dashboard of your site. This is the main area where you can easily make modifications and updates to your site.
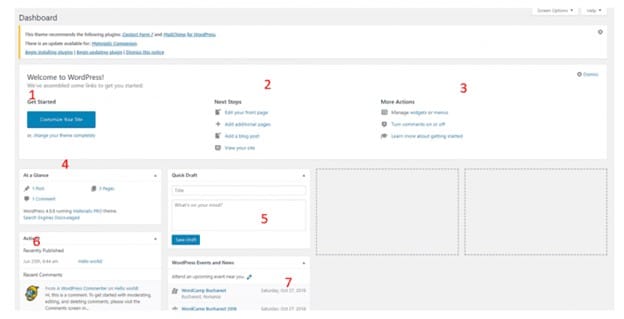
1. Getting Started
Customize your site
This link will take you to the customizer, which is an interface that allows you to adjust settings for the website’s appearance and preview them as they would appear on your live site. Be aware that there are other ways to edit your site and that you do not have to use the customizer tool, although it can be very useful.
Change your theme completely
This link will take you to an interface for visualizing different themes. From there you can select and activate a different theme than the one that you are currently using. Keep in mind that changing your theme is a big step and some things on your site may not transfer over from one theme to another so this should not be done on a whim. If you are going to change your theme, make sure everything is backed up and be careful to ensure nothing on your site breaks during the transition.
2. Next Steps
Edit your front page
This link is an option for editing the front page of your website. You can add text, customize existing text, or insert a “Read More” tag.
Add additional pages
This is a shortcut link for adding new pages to your site. You only have to enter a title and then . There are also editing options that will help you properly customize the page contents.
Add a blog post
This is a shortcut for adding a new blog post to the website. Much like pages, blog posts need titles and copy to be published. Enter your title and add your copy into the corresponding spaces. Using the available editing options will help give you the desired appearance for your blog content.
View your site
This link takes you to the live version of your website. This will show you what your website looks like to your users and is very helpful to double check after making changes to your site. Ensuring everything looks correct on the user end of your site is a quick and easy step that you should always take to guarantee the best possible user experience.
3. More Actions
Manage widgets or menus
Adjusting widgets and menus can help you better organize the elements within your site in order to create a clean and easy to use platform for your users. This link will help you access the customization sections for your widgets.
Turn comments on or off
Comments can be a great way to interact with your viewers and get honest feedback on your posts. However, you can’t filter out who can comment and who can’t, so this isn’t always a great choice for sites with large followings as large amounts of comments can very quickly slow down your site.
Learn more about getting started
This link will take you to additional resources and further instructions on how to get started with WordPress. If you don’t feel like you need additional help you can disregard this, but it is a great resource for anyone just starting out that may still be a little confused.
4. At a Glance
This section is a general overview of the current version of the site. It will tell you the number of posts, pages, the number of comments, the active theme, and the version of WordPress being used. This is a great place to go if you’re looking for some quick stats and information about your site.
5. Quick Draft
This section is for putting ideas down by simply jotting in a title and short description about what will be written next. You can then save this draft and it will be stored in the posts list awaiting development before being officially published.
6. Activity
This is a record of all the latest activity on the site. It will list what’s recently been published and any new comments that have been posted. It will also list that status of the comments, whether they are approved, pending approval, spam, or even comments that went to the trash. From here you can take action to delete a comment or change its status.
7. WordPress News and Events
This last section is just what is sounds like: a featured news section displaying the latest information about WordPress and the WordPress community as well as any noteworthy events in your area.
WordPress Admin Left-Hand Menu Options
The left-hand menu within the WordPress Admin area contains several sections that allow you to access more in-depth customizations and make further and more advanced adjustments.
Pages
All Posts
This subsection will take you to the full list of posts, both published and drafted. This also shows you information regarding the authors of each post, the date each post was published or last modified, what category a post belongs to, and which comments correspond with posts.
Add New
From here you can add new posts, save posts as drafts, or publish posts directly.
- Title the post
- Add content for the body of the post
- Customize the body text using the following toolbar options:
- Format text as headings to structure your post and break up chunks of information to make it easier to understand for your readers
- Make text bold to highlight important ideas
- Italicize text to highlight quotes or book titles
- Display your text using a bulleted list
- Display your text using a numbered list
- Insert a quote block
- Change the text alignment
- Insert a link into your text
- Insert a Read More tag, which breaks up your text so that only that top part will display on the blog home page
- Expand the list of options using “Toolbar Toggle”
- Click Save as Draft or Publish
Categories
In this subsection you can create new categories or assign posts to existing categories. Each category must have a name and a specific slug, although adding a description to your category is optional.
Tags
In this section you can add tags to attach to blog posts. Much like categories, you will have to give each tag a name, specify the slug, and add an optional description if desired.
Pages
This section allows you to manage all of the pages on your site. Pages are easy to create and there are a few very important pages that every website should have, such as a Contact page, a FAQ page, and a Home page just to name a few.
All pages
This shows you a list of all pages on your website including the title, author, date published, and any corresponding comments.
Add new
This section is much like the “Add New” section under Posts. The editing options are the same, only applying those customizations to a web page rather than a blog post.
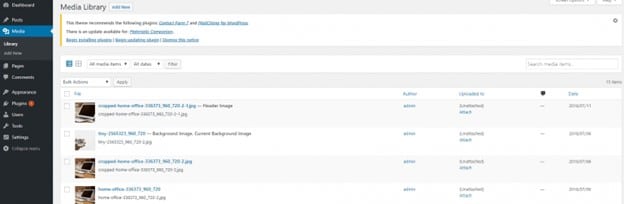
Media
Library
This is the list of all media files that have been uploaded to your WordPress site. You’ll see them within a table of data including the date they were uploaded and the page or post they were attached to.
Add new media file
This subsection allows you to easy add media files by simply dragging and dropping image or video files. They will then be automatically added to your media library for immediate use on your site.
Comments
This is where you’ll find a list of comments to your posts. Hovering over a post gives you access to buttons for approving, replying to, editing, deleting, or marking comments as spam.

Appearance
This is the section that you will use most when customizing the appearance of your website or blog.
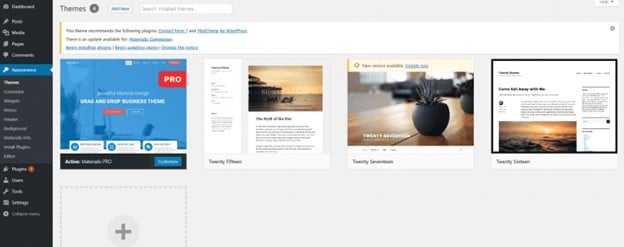
Themes
This is a section dedicated to your themes list. This interface allows you to activate one of the existing themes on the list or upload a new premium theme from an outside source. Remember that changing your theme is a big step and can easily break parts of your site if you are not properly prepared for the transition.
Customize
This link will bring you to the customizer. This corresponds with the active theme your are using and allows you to adjust website settings and customize appearances.
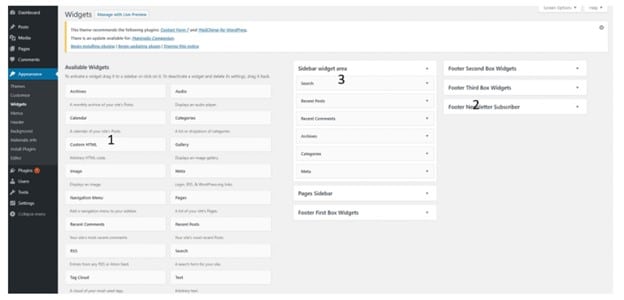
Widgets
This area allows you to add and manage widgets. The list of available widgets is displayed on the left side of the screen, while the possible location options for widgets is listed on the right. To add widgets into your website you need only drag and drop the desired widget into the corresponding website location. The widget sidebar area comes pre-loaded with some widgets that you can edit or delete from this section. You can also replace these default widgets with your own widgets if you wish.
Menus
This section is dedicated to adding menus into your website.

To create a new menu, you only need to give the menu a name and then click Create New Menu. On the left side of the screen there is a list with all of the pages, posts, custom links, and categories. On the right side of the screen there is a list of options for customizing your new menu.
Header
Clicking on header will take you to the customizer where you can make changes and customizations to your website header.
Background
Clicking on background will also take you to the customizer, where you can make any desired changes or customizations to the background of your site.
Install plugins
In this subsection you will be given a list of recommended plugins to install for the WordPress site. You can install or update them directly from the plugins table.
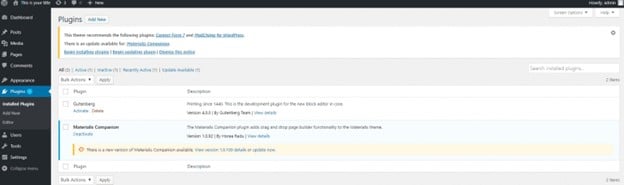
Plugins
Installed plugins
This is where you will see a list of installed plugins with details about which plugin version your site is using and whether or not a plugin needs an update. You can activate or deactivate plugins or even delete them if they are no longer needed.
Add new
This subsection allows you to browse through the list of available plugins or search by name for the plugin you are looking for. After selecting the desired plugin, you will need to install and activate it before it will be usable on your site.
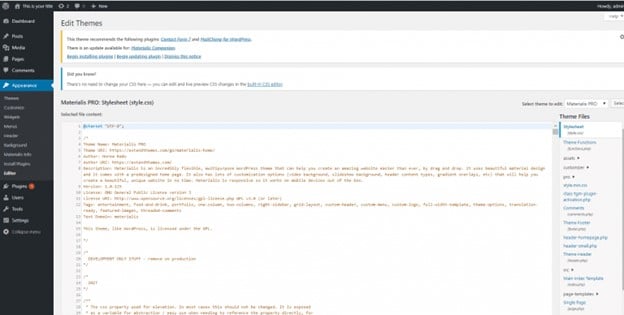
Editor
This section allows you to edit the code of your plugins. It is recommended that you do not make any major changes to this code as it could drastically affect the functionality of the plugin. Especially if you are unfamiliar with coding it is best to stay away from this section.
When you access the WordPress editor, under Appearance, you’ll find the source code for different parts of the website. This is where you can make some modifications according to how you want the website to look. However, you shouldn’t make major changes to these lines of code, as they might result in incompatibilities that break your site.
Settings
The settings section is one that you shouldn’t just pass over, when you’re making customizations for a new site or blog these modifications will apply sitewide.
General settings
From the general settings subsection you can perform the following actions:
- Add a site title that sums up what the website is about
- Add a tagline, which serves as a motto for the entire website
- Change the WordPress address/URL – this is the address you want the website to be found at. It helps defining whether you want the website address to be a domain or a subdomain (version with or version without www.)
- Enter your email address which will be used for admin purposes
- Set or change the site language
- Set or change the time zone to show accurate dada on when posts were published or changed
- Set the date format
- Set the time format
Reading
From here you can:
- Set what content you want to show your users on the homepage
- Set the number of articles that a blog page will show
- Determine whether the articles in a feed will appear in full text or as a summary
Discussion
These settings refer to customizations for the comments. You can adjust comments settings and comments moderation from here.
Permalinks
Permalinks are the permanent links (or URLs) of posts and pages in your website. There are several different settings for the permalink structure, all of which can be found in this subsection.
Users and user roles
In the left-hand menu of the WordPress admin dashboard, you’ll also find a section destined to users and user roles. User roles are important for making teams work effectively and protect the website as well.
- Administrator – this is the most powerful user role with the ability to publish, edit, delete, and implement sitewide changes
- Editor – has the ability to manage content and can edit, delete, and publish but cannot implement sitewide changes
- Author – has limited access to the WordPress dashboard and is only allowed to publish and edit their own content
- Contributor – can only edit or delete their own posts but does not have the ability to publish posts
- Subscriber – allowed only to read posts and is useful for subscription based websites where only people with a login can access site content