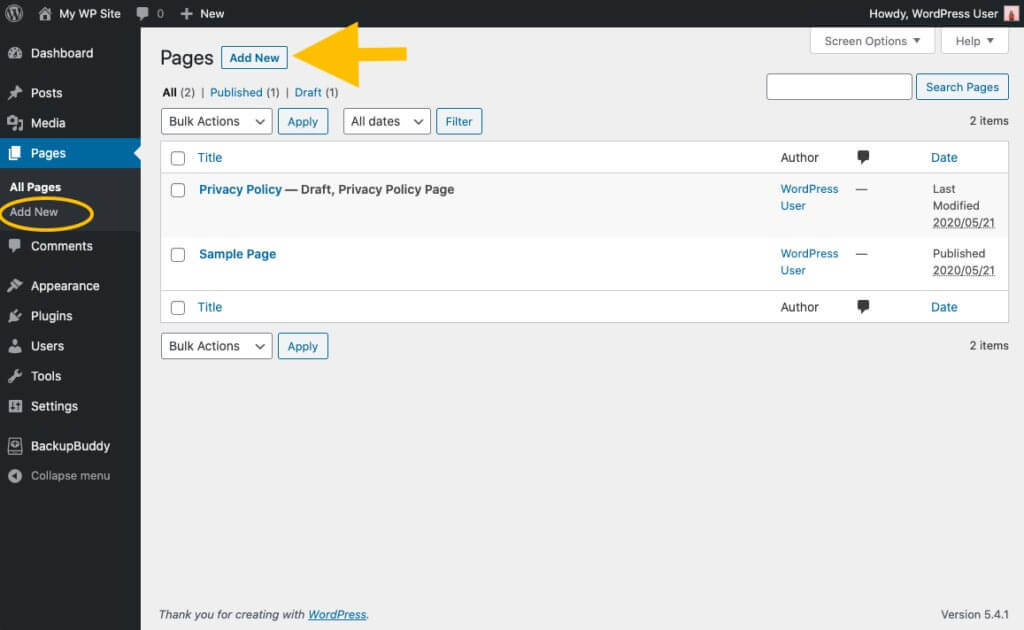
To get started with adding pages to your WordPress site go to Pages from the WordPress dashboard navigation menu and click Add New.
-
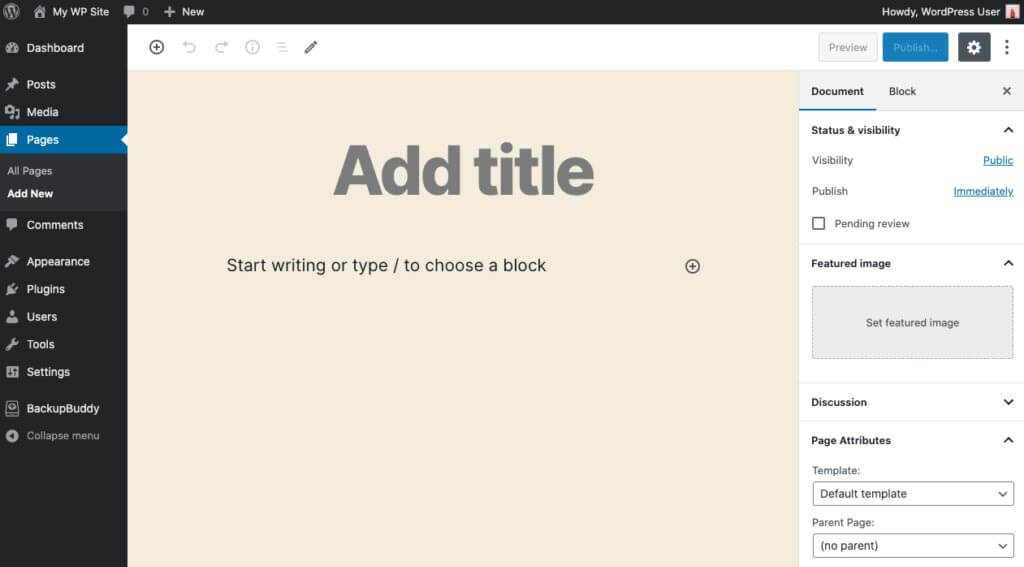
Add Page Title
To add the title of the page click the Add Title text to open the text box where you can add your title. The title of your page should be indicative of the type of information that page will contain. For example, for your about page your title could be “About Us”.
-
Start Writing or Choose a Block
Once you’ve entered your page title it’s time to add some content to your page. This can be anything you want, from images, text, headings, lists, buttons, and many more. To see all of the available blocks for your page click the + button at the top of the page. This will bring down a list of all of the blocks available to you so that you can start building out your site.
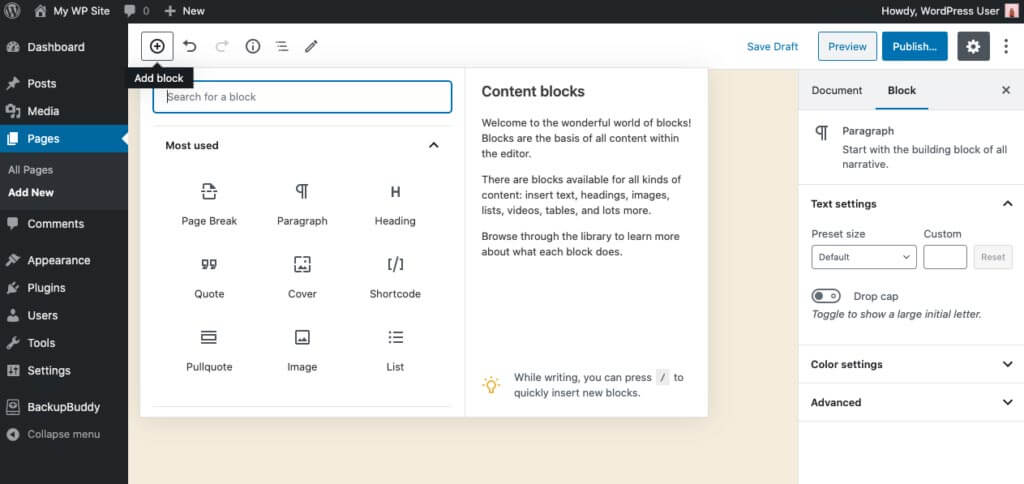
-
Everything you need to know about WordPress Content Blocks
Content blocks are the basis of all of your content within the WordPress page editor. Here is a list of all of the blocks available to you and what each of them does.
- Paragraph
- The paragraph block allows you to easily craft content and if the default block type for adding text to the editor. It is likely the block that you will use the most.
- Image
- The image block allows you to insert an image into your content via upload, Media library, or URL.
- Heading
- The heading block adds heading text to help introduce new sections and organize content. This can help visitors read and understand your content more easily and search engines will also use the headings on your page to understand it’s structure and content.
- Gallery
- The gallery block allows you to display multiple high-quality images in a structured and visually pleasing way on your site.
- List
- The list block adds a bulleted or numbered list to your page, allowing you to easily break up content and highlight important ideas.
- Quote
- The quote block gives a quote on your page more visual emphasis, allowing it to stand out against the rest of your content and draw the attention of your viewers.
- Audio
- The audio block embeds a simple audio player into your site, allowing you to upload an audio file for your viewers to listen to.
- Cover
- The cover block allows you to add an image or video that includes a text overlay. This block is great for headers because it allows you to add an interesting image or video behind your title.
- File
- The file block allows you to add a link to a downloadable file on your webpage. This is especially useful for linking free pdf downloads or additional documentation.
- Video
- The video block is very similar to the audio block in that it allows you to embed a video file onto your site. You can upload your video via your media library or URL
-
WordPress Document Settings
Once you’ve built out your site with all of the necessary blocks, you can focus on other aspects of setting up your page. On the right side of the page editor, you’ll see a tab for document settings.
- Status & Visibility
- The status and visibility section contains details about how and if your page is viewable. Visibility allows you to select between three options:
- Public
- Private
- Password protected
- Public allows your page to be visible to everyone, private means it will only be visible to you and other site admins or editors, and password protected makes your page viewable only by entering the correct password.
- The status and visibility section contains details about how and if your page is viewable. Visibility allows you to select between three options:
- Schedule publishing
- The Publish settings allow you to select immediately or choose a date to publish your page later on. If you don’t want to wait to publish your page, then ignore this setting and keep this setting on “Immediately”. However, if you would like to schedule your page to publish on a specific date and time you can use this setting to automate the process.
- Permalink
- Permalink is short for “permanent link” and this field allows you to customize the last part of the page URL, or what we call the slug. For SEO purposes, it is important to choose a slug that matches the title of your page rather than a random string of numbers and letters.
- Featured image
- Depending on your theme the featured image of your page could be used in several ways. It could pop up in a gallery-style listing of pages or on social media as the preview image when your page’s link is shared.
- Discussion
- Discussion allows you to determine whether or not you want to allow comments on your page. This setting is automatically turned off but can be enabled if you want to allow more user interaction with your page.
- Page attributes
- The page attributes section applies a parent page and template to your page. For the parent section, you can arrange your pages into hierarchies. For example, this new page could have other pages under it and be a parent page or could be placed under an existing page as a child page. Some WordPress themes have custom templates, if this is supported by your theme you will be given the option to apply a template to your page. The order box allows you to order your page numerically instead of alphabetically.
- Save draft or Preview
- You can save your page as a draft or preview the page before publishing
- Publish
- Once you’ve added all of your content and polished it to look exactly how you want it’s time to publish! Double check your settings one last time, but don’t worry if things aren’t perfect because you can always go back in and make additional changes. Once published you will receive a confirmation that your page is now live.