If your business sells any sort of products, then having an online store is almost necessary. Luckily, if you are using the popular ecommerce plugin WooCommerce on your website then you will find adding products to your site to be an easy process. For being free, WooCommerce is almost magical in its simplicity and professional looking results. WooCommerce has paid extensions that boost its functionality, but in this walk-through, we will be using only the free features.
The first way to add products is to add them manually, one at a time. This is the easiest way if you just have a few products to add.
- Make sure that WooCommerce is Installed and activated on your website
- Hover over the Products tab in the left-hand tool bar and select “Add New” from the menu.
- Fill in the fields with product information. The fields are pretty self-explanatory and easy to follow. If you want more guidance on what each field does, check out the resource below.
- When you are finished, scroll to the top of the page and look on the right of the screen. You will find options to preview the product, save as a draft, or publish. If you are not ready to take the product live, then save it as a draft. If you are ready, then preview the product to make sure it is to your liking and then publish. You can also schedule the product to publish at a later date.
If you have a large number of products to add, it may be more beneficial to add them via a spreadsheet. This can be accomplished with WooCommerce’s built in Import/Export tool or a free plugin such as Product Import Export for WooCommerce by WebToffee.
- Hover over the Products tab in the left-hand toolbar and select “All products” from the menu.
- At the top of the screen you will see a button for importing and one for exporting. Click on the Import button.
- Click “Choose File” and select your csv spreadsheet. When the csv file has uploaded, click “Continue.”
- Map your spreadsheet columns to the appropriate product fields. When you are finished, start the import.
- When the import is finished check through your products to ensure they are correct, and you are done!
The process for adding products is pretty straight forward and once you’ve done it once you will probably feel pretty comfortable doing it again. However, if you would like a little more guidance on the process or are curious what each data field is for, read on.
Adding a product manually
This option is best for small businesses or if you don’t have very many products to add. Begin by hovering over the Products tab in the left-hand tool bar and select “Add New” from the menu. This will take you to a “add new product” page. The layout is pretty self-explanatory and easy to follow.
Start by adding the name of your product. Under the name, in the text box, add a description for your product. This text box is where you can add a big description of your product to really inform your consumers about the product and boost SEO. Right above this text box you will see a button that says, “Add Media.” This button will add things like pictures and videos to your description. This is not where you add a thumbnail image or gallery images to the product (we’ll get to that later).
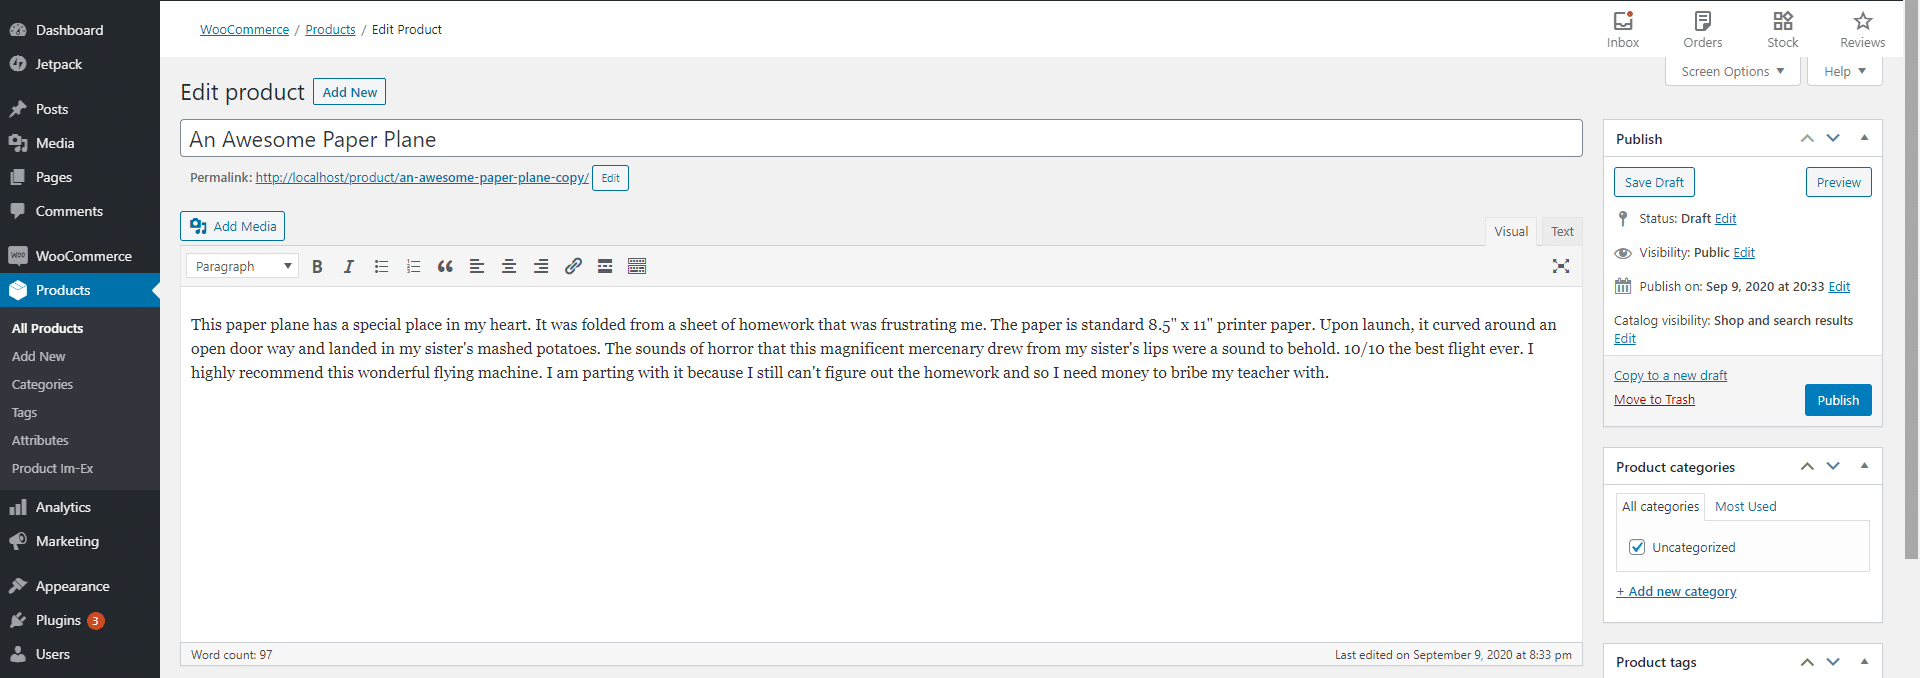
Below the text box you will find the fields to enter all the product data. Because the sample product I have listed is a physical item that I would be shipping to someone I leave the dropdown menu on “simple product.” If what I was selling was a virtual product (say, access to a class) then I would check the box that says “virtual.” If what I was selling was a downloadable product, like a model file for 3D printing or an online art piece, I would select the “download” box. From the dropdown menu you will find other product types as well such as grouped, Affiliate, and Variable. Grouped is just individual items sold together. External/Affiliate are products that you don’t own but that you are promoting on your site. Variable products are products that come in several different variations such as color or size. For more information on product types check out this article.
Next, enter your price for the item. Off a fresh install of WooCommerce, you may find that it has the wrong currency listed next to the price fields. For example, on my install it had the price listed in pounds sterling when I needed it in US dollars. To change this, hover over the WooCommerce option in the left hand toolbar and click on settings. Scroll to the bottom of the page and select the type of currency you wish to use.
You can also set a sales price and schedule when it will take effect. Simply enter the sales price then click on the “schedule” button next to the field. Enter the range of dates you wish to run the sale.
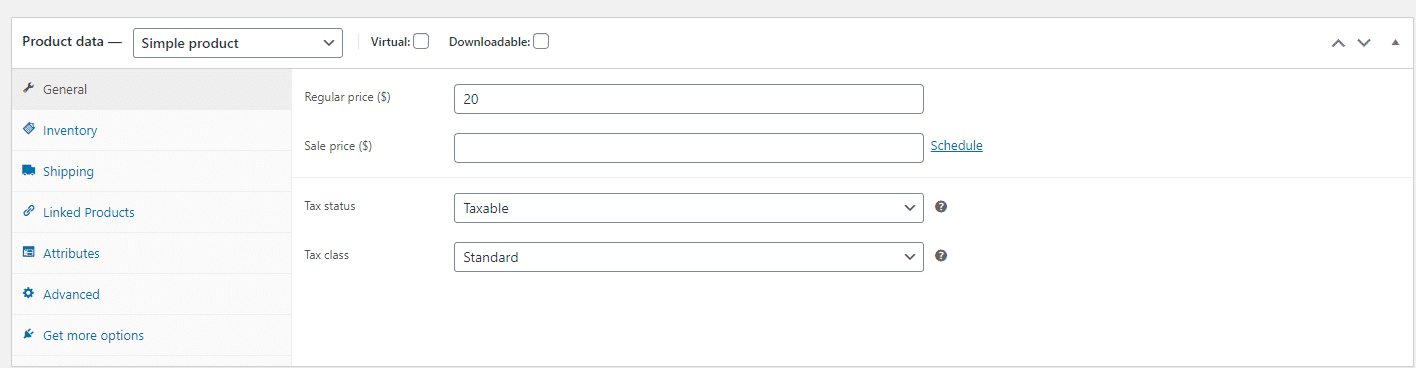
Next, click the button that says “Inventory.” If your product has a SKU, enter it in the SKU field. If it doesn’t, then just leave it blank. You then need to select how you want to manage your stock. If you check the manage stock box it will give you the option to indicate how many of that product you have on hand. You can then select if you want back-orders to be available. You can also configure a low stock warning that will send you a warning email if your stock quantity reaches a certain level. If you don’t want to configure that stuff, you can just skip over that box and indicate the stock status from the dropdown menu. You can also enable a “Sold Individually” option that allows only one of that product to be purchased at a time.
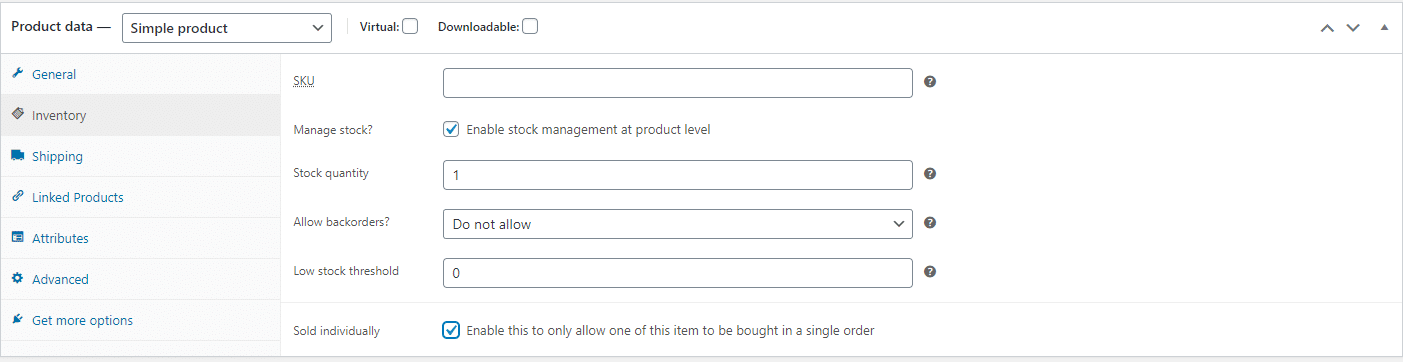
Moving along, we will now configure the shipping information for this product. Begin by entering the weight and dimensions of the packaged product. You can then decide whether any shipping classes apply to your product.
Note: If you want to change the units for weight or dimensions, you can go to the WooCommerce >> settings >> products.
A shipping class allows you to change the shipping price for certain products or groups of products. WooCommerce’s basic shipping options include free shipping, flat rate, and local pickup. But what if you want to charge different shipping prices for different products? That’s where shipping classes come in. For example, suppose you had configured a flat rate shipping charge for your products. You then stated selling a line of hazardous products that required special (and more expensive) shipping. you could create a shipping class that would add an additional charge to the general flat rate shipping charge. For more information on shipping classes and how to configure them, check out this article by the WooCommerce creators.
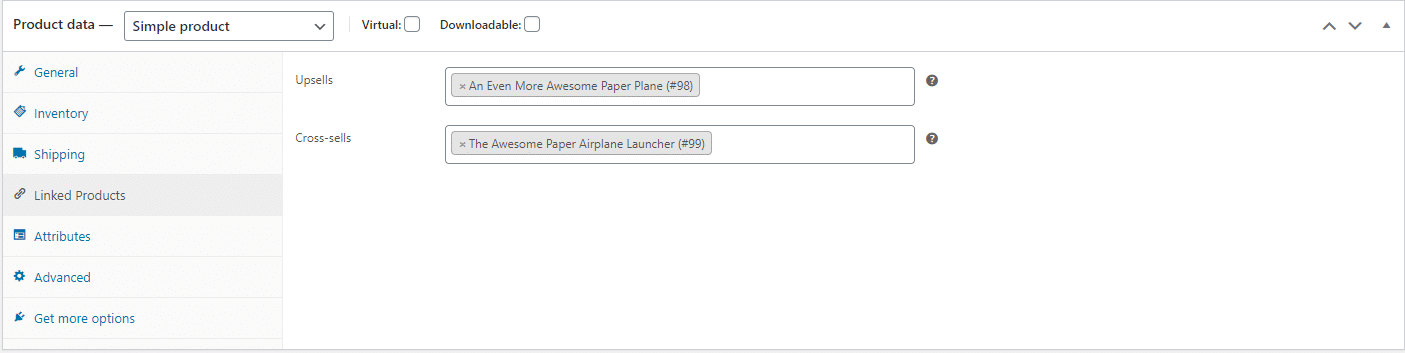
After that we can link other products. This is where you can do some free marketing. With the upsell field you can link a better, more expensive variation of the product your costumer is considering. This is excellent marketing because you can offer the product to them in the moment of purchase. With the crosslink field you can add links to similar products that you think my interest the buyer. This can help the buyer to find exactly what they need or to find other products that might compliment their current purchase. Adding upsell and crosslink products is as easy as typing the name of the product you wish to link into the appropriate field.
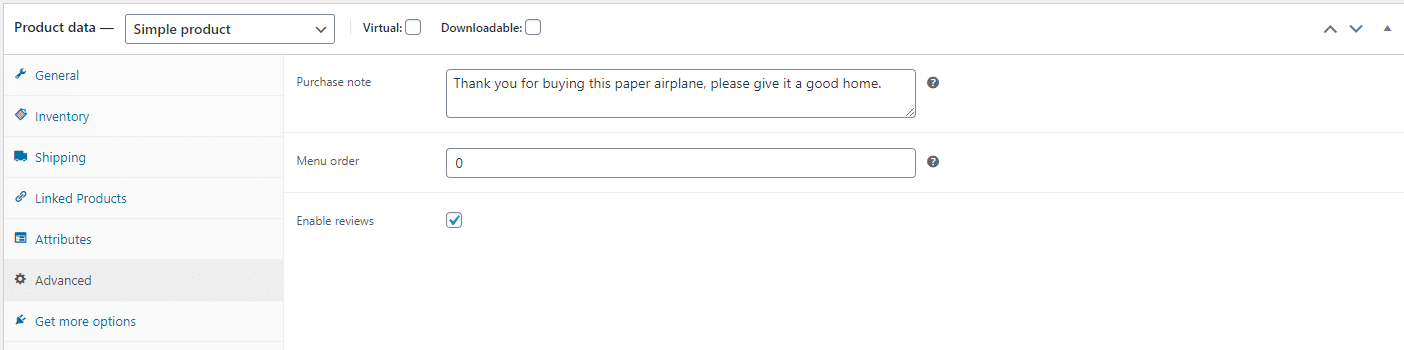
The advanced options allow you to add a purchase note, configure the menu order, and enable or disable reviews for that product. The purchase note field lets you add a note to the buyer that they will see upon purchase. This could be specific instructions about the product or how it will be shipped or a special thank you for buying that particular product.
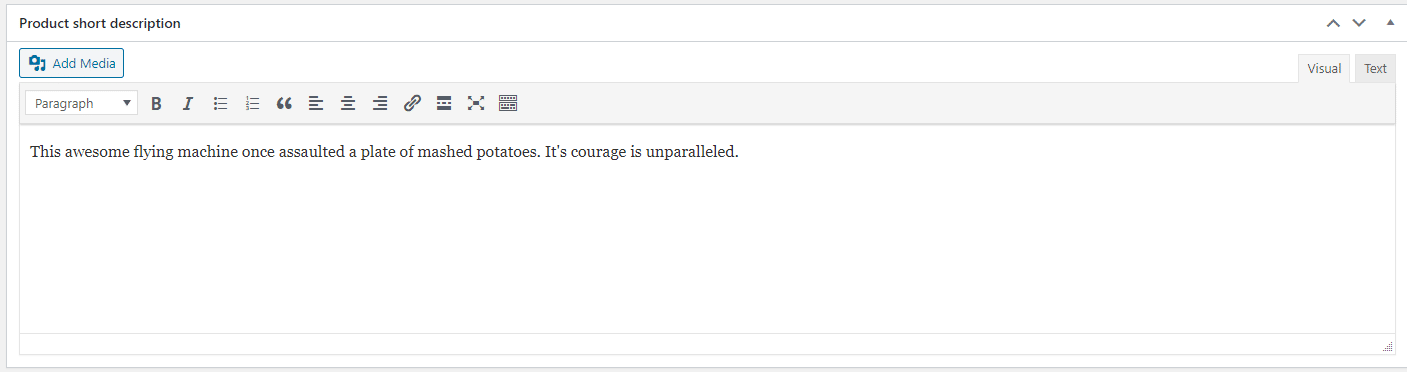
At the very bottom of the screen is a text field where you will enter a short description about your product. This description will be shown next to your thumbnail image when the costumer views your product. It should be short, sweet, and hit on the important aspects of the product without getting overly wordy.
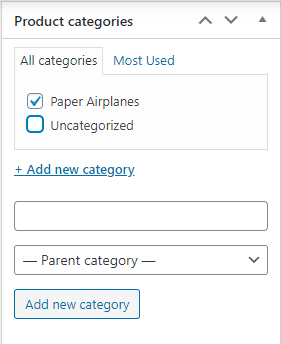
If we look at the toolbar on the right of the screen you will see several more configurable options for your product. The first option is to add your product to a category. Categories are used to group your products based on characteristics. You don’t necessarily want to sell t-shirts alongside bathroom accessories, so you separate them out with categories. If you have already created some categories simply click on the dropdown menu and select the category you wish to include your product in. If you haven’t created any categories, or your product doesn’t fit in any existing categories you can create a new category by clicking the “add new category” button. This will provide a field to name your category as well as a place to specify the parent category. The parent category is used if you are creating a sub-category. For example, if you have a category called “T-shirts” and you want to add a sub-category for women’s T-shirts, you would create the new category and set the parent category as T-shirts. If you are not creating a sub-category, then just ignore that option. When you are finished hit “Add New Category.” If you would like to add categories before you add the products, simply hover over the “products” option in the left-hand tool bar and select “Categories.” This will allow you to add and edit categories for your store. For more information, have a look at this guide from the WooCommerce creators about categories.
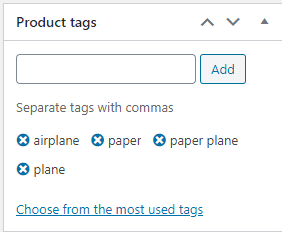
The next option is for product tags. Product tags are short keywords about your product that will help search engines link a costumer’s search with your product. To add tags, simply type in as many tags as you wish to use making sure you separate each tag with a comma. Tags are important for good SEO (search engine optimization). Make sure your tags are related to the product you are selling. Don’t include random tags in hopes that people will end up viewing your product from unrelated searches. If you do that, people will be angry with you and you’ll earn a bad reputation.
The next option is to add a product image. This image is what people will see when they are browsing through your products. It is important that you set a quality, attractive picture as your product image. To set the image, simply click the “Set Product Image” button. This will open up your media library where you can select an image. If the desired image is not in the media library, click the “upload files” button in the top left corner and browse through your computer till you find the image you want.

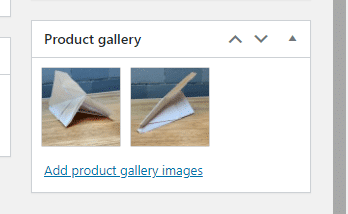
The final option is to add gallery images. The gallery images are additional images that the costumer can view after they click on the product. These images should show the product from different angles and should highlight key features of the product. These images are set in the same way as the product image.
When you are finished, scroll to the top of the page and look in the right-hand toolbar. There, you will have the option to save your product as a draft, preview the product, or publish the product. Draft will save everything but not put it out on the site for people to buy. Preview will open a new tab and show you what the product will look like on the page. Publish will add the product to your site for people to purchase. You can also schedule the product to publish at a later date by editing the option that says, “Publish Immediately.”
Adding Products via CSV Importer
If you have a large list of products and would like to add them all to your shop at one time you may want to import them from a spreadsheet. WooCommerce has a built-in product importer/exporter that works with csv files. I also tried a free plugin that accomplished the same task. The only difference between the WooCommerce tool and the plugin was the ability to specify how many products the exporter exports. We’ll walk through both methods. It is worth noting that the WooCommerce tool and the plugin can only import simple products. If you want to be able to import other product types, such as affiliate or variable, then you will need to purchase a WooCommerce extension or purchase the paid version of the plugin.
To use the WooCommerce tool, hover over the “Products” tab in the left hand tool bar and select “All Products.” At the top of the screen you will see an “Import” button and an “Export” button.
If you already have a spreadsheet of products prepared then you can skip over the next step. If you don’t have a spreadsheet then the next step will help you create a spreadsheet that you can fill in.
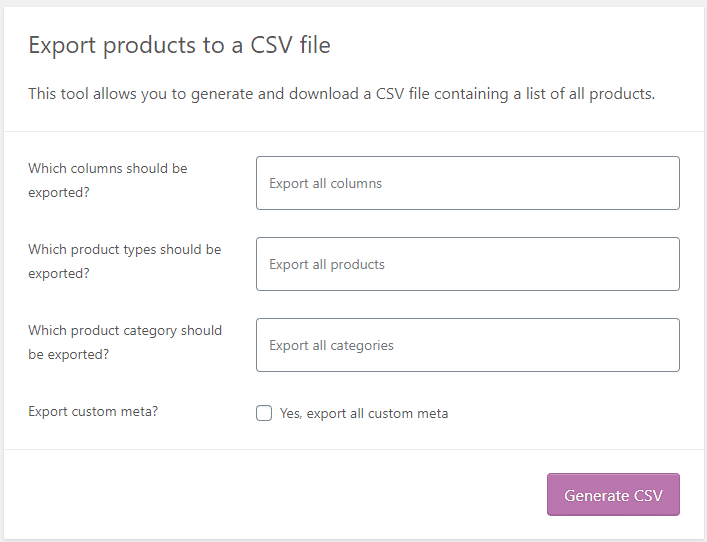
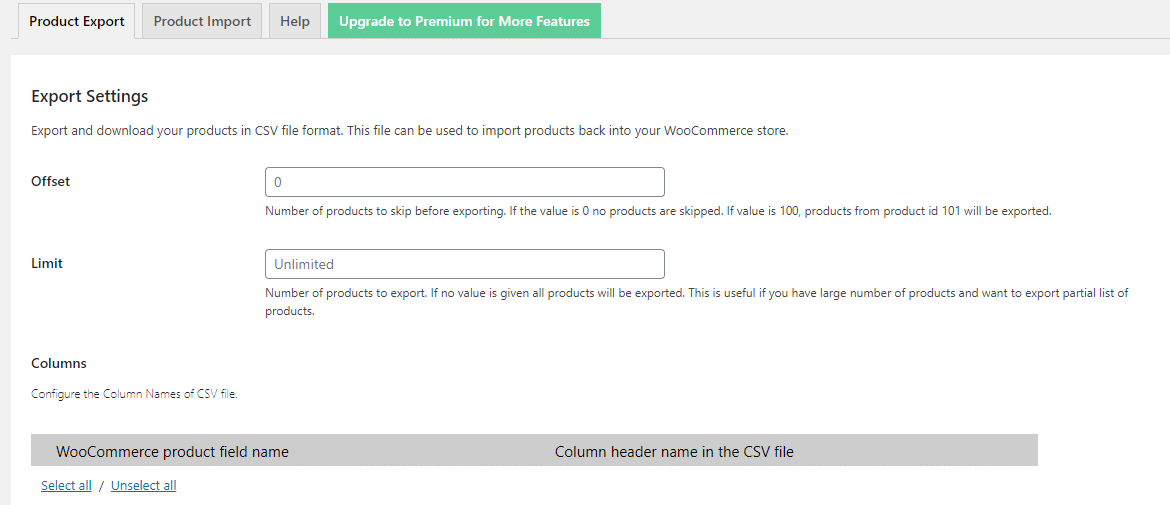
Click on the Export button. This will open up the exporter tool where you can generate a csv file to work off of. There are a couple of options that you can configure if you want, but you can also just leave everything default and hit export. This will create a csv file for you to fill in with all the correct headers on the columns. This will work to create a csv file even if you don’t have any products on your site.
Open up the csv file and fill in the columns with your product information. When you are finished save and close the csv file.
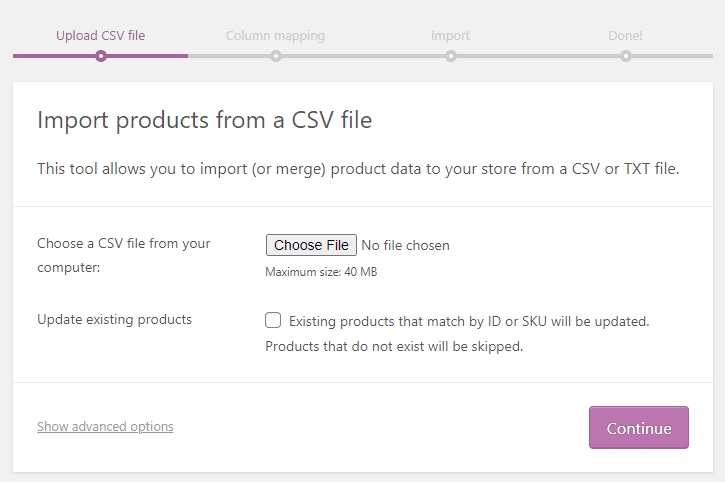
Navigate back to the “All Products” page and click the import button at the top of the screen. Click the “Choose file” button and select the csv file you just saved. Click the “Continue” button.
Now we need to map the fields. This is very easy to do. Simply look at the information in the “Column Name” column on the left and select where that information should go from the dropdown menus on the right. If you created your spreadsheet using the export tool, there is a good chance everything will already be mapped correctly. When you are finished mapping, hit “Run the Importer.”

Depending on the size of your file it may take a while to import everything. If that is the case, make yourself a snack while you wait. When it is finished, look through the imported products and make sure that everything is to your liking.
The built-in importer works very well, and my only complaint is that if you already have products in the store, you can’t export a blank csv file to work from. This is where the plugin has the slight advantage. With the plugin “Product Import Export for WooCommerce” by WebToffee, you can specify how many products you want to export. While you can’t export a blank document that only has the headers, you can export a document that includes the headers and a single product. This is much less overwhelming to look at when you are adding products to your store.
To use this plugin, start by opening your product spreadsheet or create a product spreadsheet. If you are creating a product spreadsheet, you may want to use the export tool to generate your spreadsheet. To get to the export tool, hover over the WooCommerce option in the left-hand tool bar and select “Product Import-Export” from the dropdown menu. This will take you to the exporter screen. From this screen you can generate a spreadsheet that will have all the product fields for you to fill in. If you have products currently on your site and just want a blank spreadsheet to work off, I recommend you set the limit field to 1. Scroll down to the bottom of the page a click “Export Products.” This will create a spreadsheet that has the headers and one product which you can use for reference when filling in the other products.
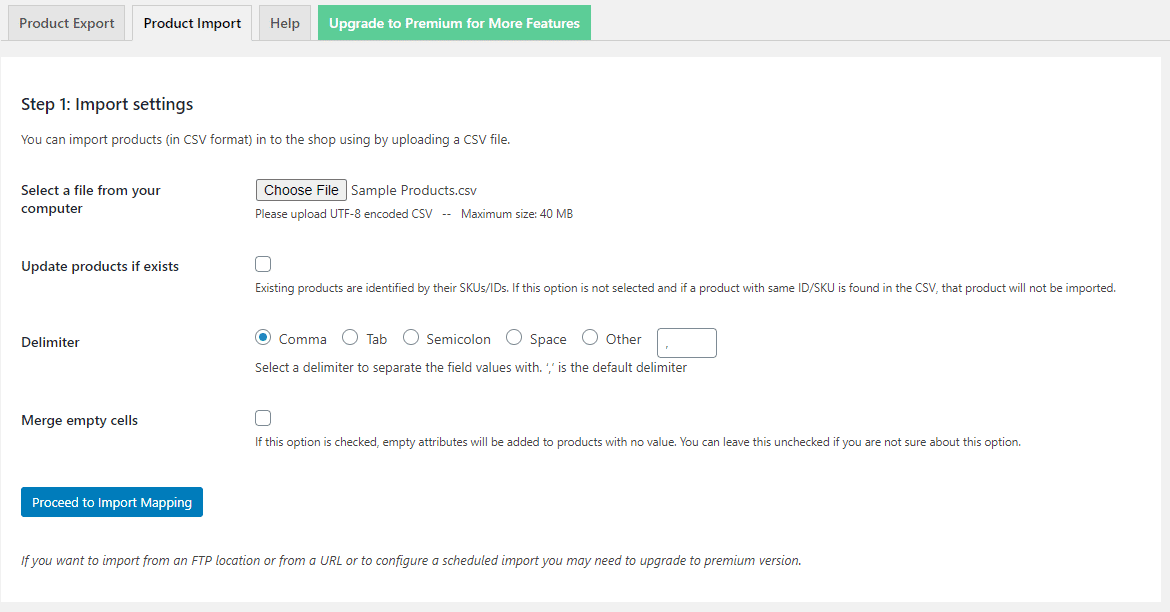
When you are finished filling in your spreadsheet or if you already have a spreadsheet, return to the Importer/Exporter tool and at the top of the screen click “Product Import.” Click the button that says, “Choose File” and select the CSV file you created. Scan through the other options and configure anything else you want. I left everything default. Click the button that says, “Proceed to Import Mapping.’
Now you need to configure which fields in the product page the columns of the csv file correspond to. This is very easy to do. Just look at the WooCommerce product field on the left and then select what content you would like to put in this field from the dropdown menu in the middle of the screen. If you don’t have content for a particular field, just leave it on “Do Not Import.” When you are finished mapping the fields, scroll to the bottom of the page and click “Start Import.”
It may take a few minutes, depending on the size of you file, but when it is finished importing all the products from the CSV should appear in your store and in the “All Products” tab under WooCommerce. Look through your products to make sure that the information is correct and you are good to go!