Advertising with Google is a great way to expand the reach of your online shop. One advertising option that Google offers is Google Merchant Center. Using Google Merchant Center will allow your products to appear in Google shopping results.
To use Google Merchant Center, you’ll need to export your WooCommerce products to the service. The easiest way to accomplish this export is with a plugin called WP All Export. We recommend WP All Export because it is reliable and simplifies the process using a drag and drop function.
Using WP All Export is easy. We’ll quickly cover the steps then go into depth on each one.
- Create a new export – Go to All Export > New Export. Ensure “Specific Post Type” is selected then select “WooCommerce Products” from the drop-down menu. Set Export type to “Feed” and select “Google Merchant Center Product Feed” from the drop-down.
- Map your data – Expand the various fields such as “Basic Product Info, Availability and Price, Product Categories, etc.”. You can use default data options or use custom data. If you use custom data, you can drag and drop the desired data from the right-hand side of the screen. When you are finished, scroll to the bottom of the screen and click “Continue.” On the following screen, click “Confirm and Run Export.”
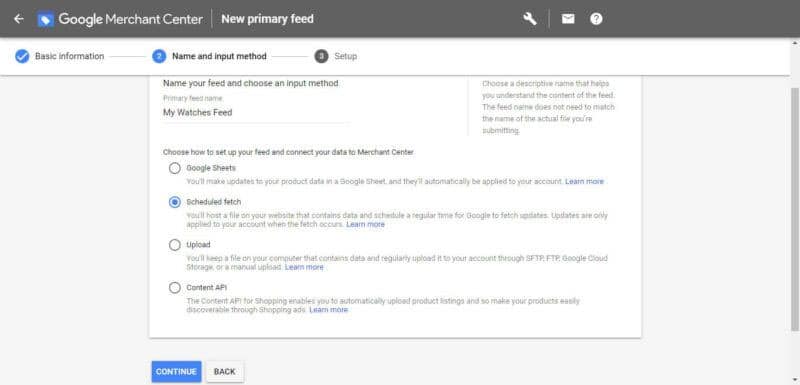
- Add Export to Google Merchant Center – Within Google Merchant Center, select Create a new feed > Scheduled Fetch. Give your feed a name. Paste the provided URL for your feed from the plugin and process the feed.
If you’d like more guidance on each step, read on.
Creating a New WooCommerce Export
Creating a new export using WP All Export is a straightforward process. From the left-hand sidebar hover over the “All Export” tab and click on New Export. The first option you’ll be presented with is whether to support a specific post type or WP_Query Results. Select Specific Post Type and then select WooCommerce Products from the drop-down menu. The plugin will tell you how many products are going to be exported. If you don’t want to export all your products, you can use the filtering options to limit the export. Once you are satisfied with the number of products being exported, click the “Customize Export File” button. Find and click on the “Export type” field. Select the “Feed” option then select “Google Merchant Center Product Feed” from the dropdown menu.
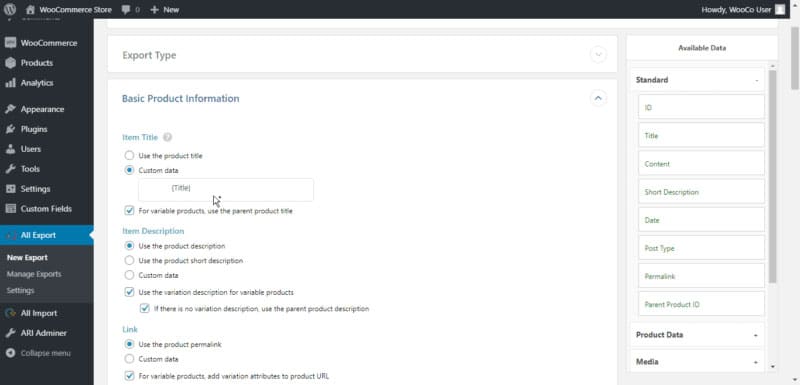
Basic Product Information
In the basic product information section, you’ll find data such as product name, product description, and product link. By default, it will export the existing WooCommerce data for each product. You can also opt to use custom data. If you want to use custom data, simply select the custom data option for each field. This opens a field where you can select your desired attributes. On the right side of the screen will be the available data that you can fill this field with. From there, simply drag and drop the data you want into this field.
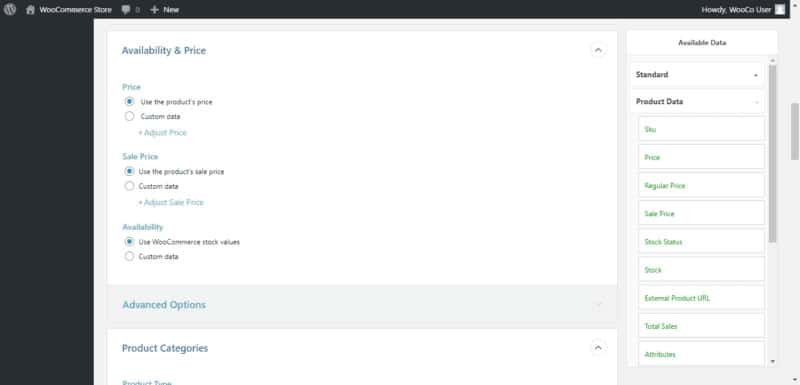
Availability and Price
Under Availability and Price you can choose to use the product’s preset price or you can select a custom price from the available attributes. The plugin also lets you adjust the price for your Google Merchant Center export. This also applies to sale prices and availability. Under Advanced Options you can set things such as currency, availability date, and sale price dates.
Mapping Product Categories
The next step in exporting products is to map your product categories. Since you’re exporting products to Google Merchant Center you will need to map your products to Google product categories. The easiest way to do this is to search for the general category you want. If you would like to be more specific you can access a list of all available Google product categories with a quick internet search. Once you’ve mapped a category to a parent in a hierarchy all of the child items are also assigned that same mapped category. This can save you a lot of time, especially when dealing with long lists of products.

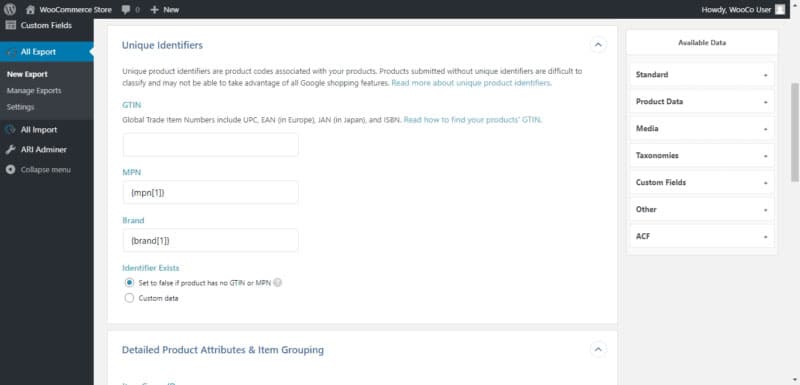
Unique Identifiers
Google uses unique identifiers to classify your products, improve adverts, and help customers find the products that they want. You can quickly map your GTIN, MPN, and Brand fields by dragging and dropping them from the right-hand side. If your products do not have a GTIN or MPN you can enable Set to false in the product has no GTIN or MPN.
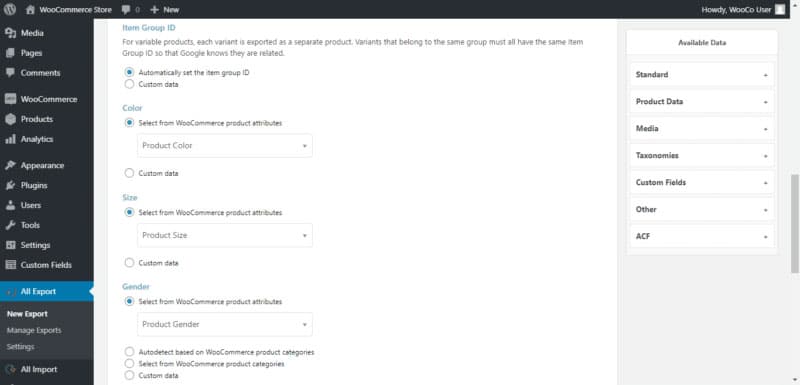
Detailed Product Attributes and Item Grouping
This section lets you map the Item Group ID for variable products. For variable products each variant is exported as a separate product, so in order for Google to group them they must all have the same product ID. Set the color, size, gender, or any other variable needed for your products using the WooCommerce Attribute values. You can also drag and drop the custom value attribute. If you need to map more variable you can use Advanced Options for things like size type, age group, material, or pattern as needed. You can easily skip over any attributes not relevant to your products.
Shipping
Shipping is one of the most important pieces of an online shop, you’ll need to properly map the shipping price and then adjust it as needed. WooCommerce values can be used to define the length, width, and height of your products. You can also choose whether or not to export the shipping weight and shipping label.

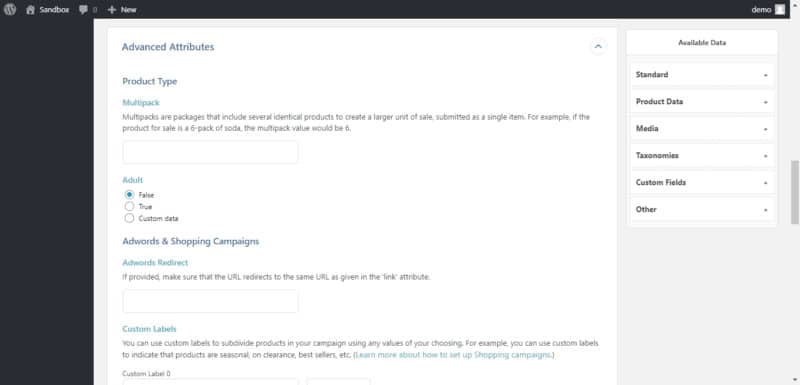
Advanced Attributes
Advanced attributes is where you can group products that are being sold as a package of multiple items, such as a pack of three socks. You’ll need to map the multipack value – in this case 3. This section will also ask if your product is an adult product, for which you can select true or false.
You can also start setting your AdWords Redirect URL and shopping campaigns in this section. However, it is best to do this within Google Ads once you’ve exported your data into Merchant Center.
Export Settings and Running the Export
In order to keep your Google Merchant Center up to date you’ll need to set the plugin to automatically export your data on a scheduled basis. We recommend doing this on a daily basis to ensure the most accurate data.
You can now run the export and then head over to Google Merchant Center to ensure everything is working properly!
Creating a New Product Feed
Within Google Merchant Center, select Create a new feed > Scheduled Fetch and name your feed. Paste the provided URL for your feed from the plugin and process the feed.
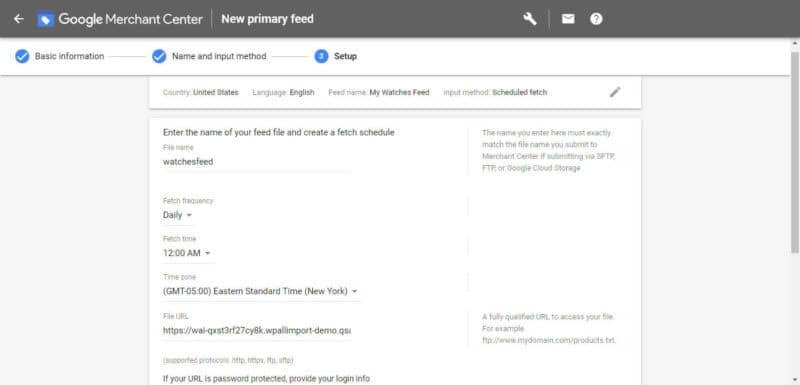
Google Merchant Center will need to process your feed, and then every day at your scheduled time the data will be re-fetched to keep everything up-to-date.