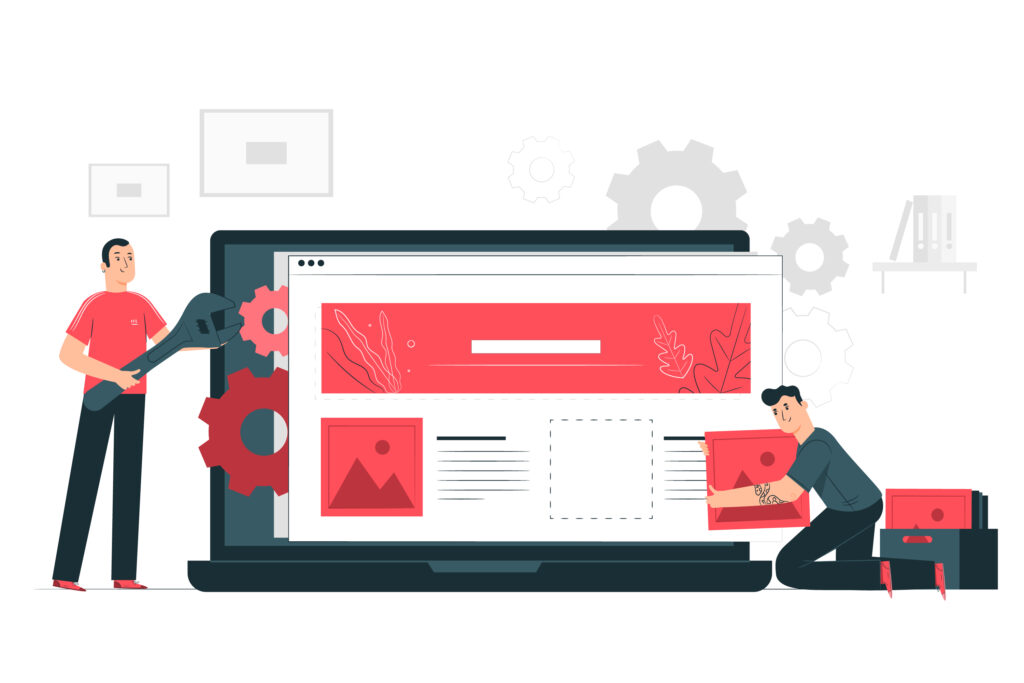
Elementor is a popular page builder that allows website creators to design their own pages with ease. One great feature of Elementor is the ability to create vertical progress trackers, which can help guide users through a multi-step process or track their progress through a particular page. In this article, we’ll go through the step-by-step process of creating a vertical progress tracker in Elementor.
Creating a Vertical Progress Tracker
First, you’ll need to set up the progress tracker widget on your Elementor page.
In the Elements tab of the tool panel, search for progress tracker, and then drag and drop the widget onto your page.
![]()
A progress tracker will then appear on your page. By default, the progress tracker is horizontal. But don’t worry, we’ll teach you how to arrange it vertically.
The default settings are as follows:
![]()
The default Tracker Type is set to Horizontal. If you drop down the list, you will also see Circular as a tracker type option. Leave it as the default Horizontal tracker type.
![]()
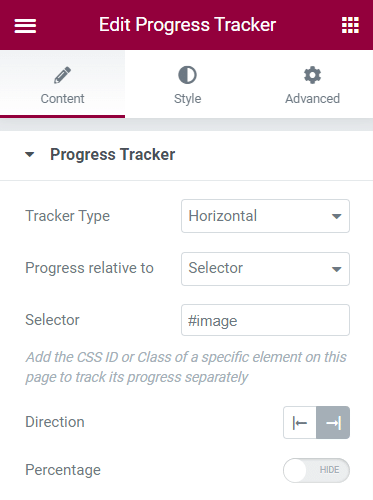
The default Progress relative to setting is Entire Page. You will want to drop down the menu and select Selector for this setting instead.
![]()
This will give you a new settings field, called Selector.
![]()
The Selector setting allows you to tie the progress tracker to an inner element on your page. To do this, you will need to select the element that you want to tie your progress tracker to.
In our case, we’re going to tie our progress tracker to an image.

Click on the blue edit icon in the right hand corner of the element you want to tie the progress tracker to. Then, in the tool bar, go to the Advanced tab.
At the bottom of the Layout tab, there is a setting called CSS ID. This CSS ID will be your selector.
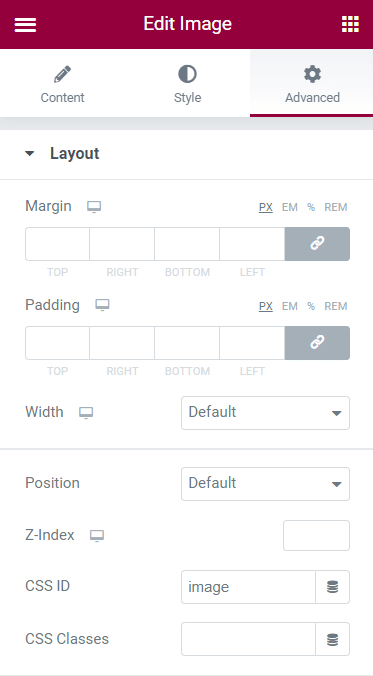
In the CSS ID field, enter the identifier for the selector. In our case, we will use ‘image’.
Then, go back to the progress tracker and enter ‘#image’ into the Selector field.
Now the two are linked, and your progress tracker will be tied to that element.
Then change the Direction to the right.
If you wish, you can also choose to show the percentage on your progress tracker. By default, percentages are hidden. To show them, simply toggle the Percentage switch.
![]()
For the next step, we’re going to move over to the Style tab in the tool bar.
First, we’re going to go over the Progress Indicator settings.

The Progress Color setting allows you to change the color of the progress bar. By default, it shows up as a bright green. You can change the progress bar to any color you like.
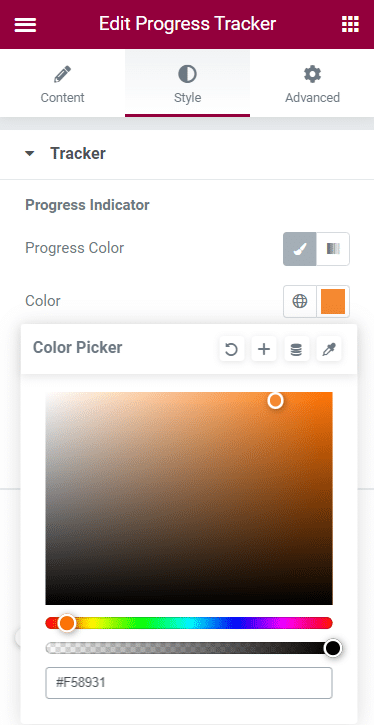
The Border Type setting gives you 6 border options: none, solid, double, dotted, dashed, and grooved. If you select a border type that isn’t ‘none’, a width bar will appear, allowing you to change the width of the border.
You can also change the color of the border, and the border radius. By default, the border radius is a rectangle. By adjusting the Border Radius settings, you can make the progress tracker’s edges more round.
![]()
As you can see, we made our progress tracker orange with a solid border and set the border radius to 10 all around.
Next, we’re going to adjust the Tracker Background settings.
![]()
These settings are very similar to the Progress Tracker settings. You can change the background of the tracker and its’ height, and you can add a border type, box shadow, or padding.
These settings are all up to design preference, so play around with them and see what works best with the style of your site.
Finally, go to the Advanced tab in the tool bar.
![]()
We will be adjusting settings in the Motion Effects, Transform, and Custom CSS tabs.
Starting out in the Custom CSS tab, enter the following custom code into the Custom CSS field:
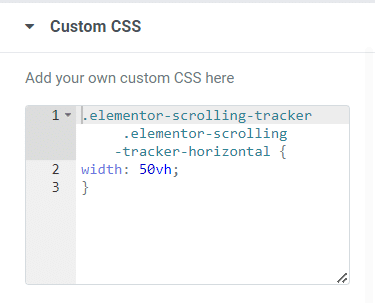
This allows us to define the width of the tracker. In this case, we’ve set the tracker to be 50% of the height of the window.
Next, we will rotate the tracker 90 degrees using the Transform tab.
Click on the icon next to Rotate and enter 90 into the text box.
![]()
Now go to the Motion Effects tab.
Next to Sticky, select Top. Then type 100 into the Offset text box.
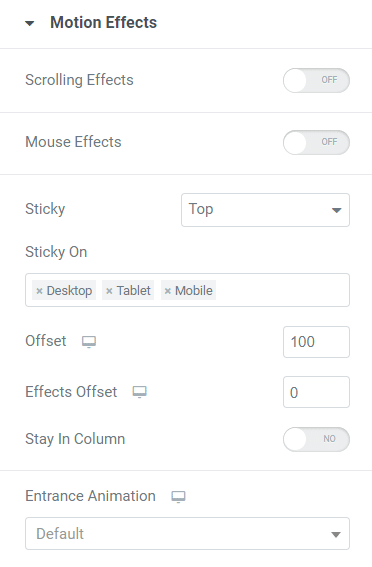
Now you can see we have a vertical progress tracker that will move with us as we scroll down the page.
This is just an example page, play around with your settings and design to find what works best with your layout and style.
![]()
A vertical progress tracker can be a helpful addition to any website, as it guides users through a process and shows their progress in a clear and visual way.
With Elementor’s user-friendly interface and customizable widgets, creating a vertical progress tracker is quick and easy.